default gateway : 10.0.2.1
2. Install Oracle 12C
2.1. Preparing for the Oracle 12C Installation
2.1.1 Login to the Root and check Status
Open the new terminal and give the command “su root “then give the root password after
Type “hostnamectl”to show the hostname, operating system and Icon name.
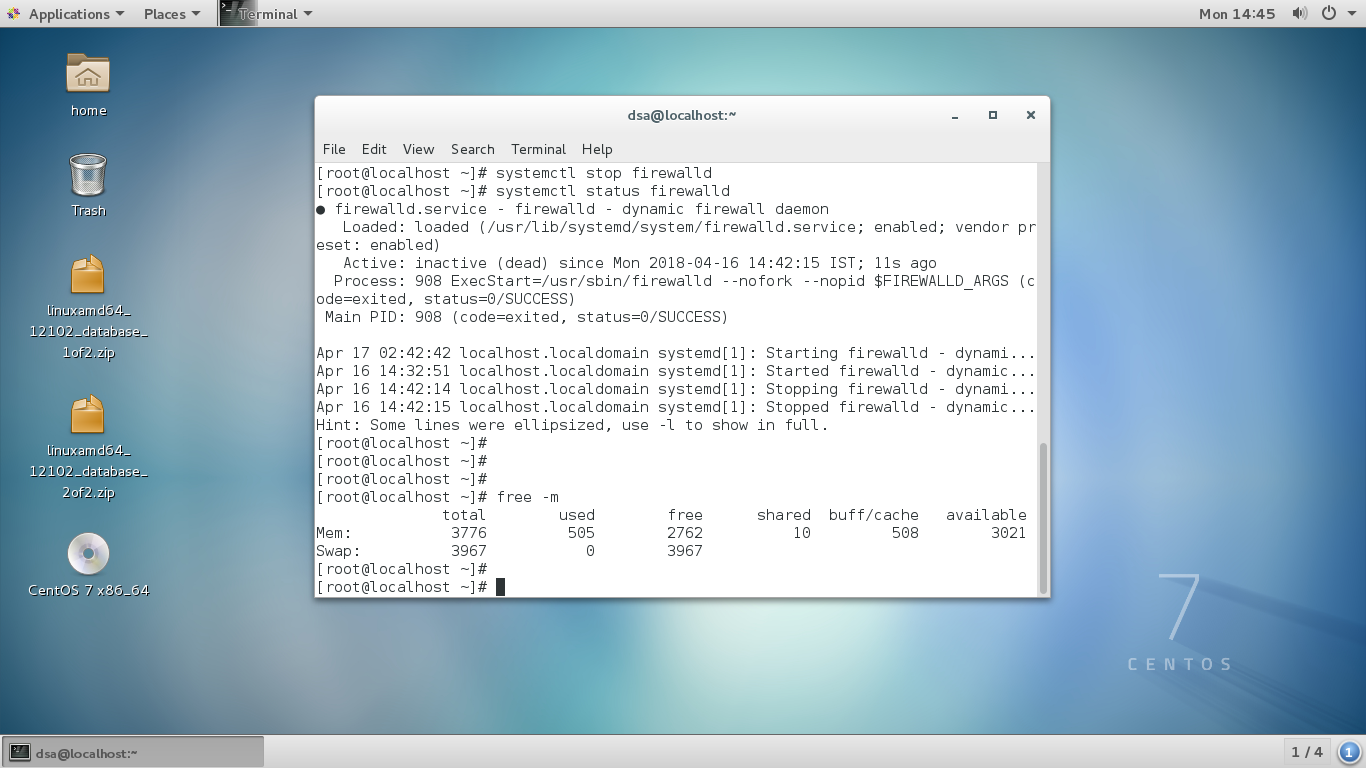
2.1.2 Check the Firewall
status and stop the Firewall
Using following commands, you can check the fire wall status
and stop the firewall to install the oracle 12 C.
# systemctl ststus firewalld
# systemctl stop firewalld


2.1.3 check the Swap file space
Install the oracle 12 c minimum swap file size is 2 GB.
2.1.4 Create Required OS users and groups for
Oracle Database
To run the oracle database, we must create a user. Using
following command, you can create the user account and give the password to the
account
#groupadd oinstall
#groupadd dba
#useradd -g oinstall -G dba oracle
#passwd oracle <your password >
2.1.5 Add the Kernel Parameters for oracle 12 C
After the creating the new user account you must add kernel
paraments to the account to do that write the following statement to the “sysctl.conf” file.
To edit the file, you must give this command
#vim /etc/sysctl.conf
Then copy this statements to the file and save the file.
fs.aio-max-nr = 1048576
fs.file-max = 6815744
kernel.shmall = 2097152
kernel.shmmax = 2147483648
kernel.shmmni = 4096
kernel.sem = 250 32000 100 128
net.ipv4.ip_local_port_range = 9000 65500
net.core.rmem_default = 262144
net.core.rmem_max = 4194304
net.core.wmem_default = 262144
net.core.wmem_max = 1048586
2.1.6 Specify
limits for Oracle User
2.1.7 Extract the Oracle Database Software
To Install the require package to unzip the software you
must give this command
# yum -y install zip unzip
2.1.8 Modify Permissions
Change the permissions in your extracted file location
# chown -R oracle:oinstall /stage
Create the separate two directories to install the oracle
12c and give permissions.
# mkdir /u01
# mkdir /u02
# chown -R oracle:oinstall /u01
# chown -R oracle:oinstall /u02
# chmod -R 775 /u01
# chmod -R 775 /u02
2.1.10 Install the Required Packages to Install the
Oracle 12 C
You must install the packages to install the oracle
otherwise oracle was not work properly. In the command line you must give this
command and it will download and install
the packages.
# yum install -y binutils.x86_64 compat-libcap1.x86_64 gcc.x86_64
gcc-c++.x86_64 glibc.i686 glibc.x86_64 \
glibc-devel.i686 glibc-devel.x86_64 ksh compat-libstdc++-33
libaio.i686 libaio.x86_64 libaio-devel.i686 libaio-devel.x86_64 \
libgcc.i686 libgcc.x86_64 libstdc++.i686 libstdc++.x86_64
libstdc++-devel.i686 libstdc++-devel.x86_64 libXi.i686 libXi.x86_64 \
libXtst.i686 libXtst.x86_64 make.x86_64 sysstat.x86_64
# yum groupinstall -y "X Window System"
2.1.11 Connect the Oracle Using SSH and Install the
Oracle Database
Run the installer using graphical user interface
To install the oracle, you need to access GUI give this
command in the root account.
#ssh -X oracle@localhost.localdomain
To start the installer, give this command. After oracle
installer automatically run.
# /stage/database/runInstaller
Configure security update
In “configure security update “tab untick the “I wish to receive security update via my Oracle Support” otherwise program will check for updates. Then click “Next”.
Installation option selection
Under the installation option select “Create and configure a database”
Selecting System class
I this
window there are two options one is “Desktop class” other one is “Server
class”. Select server class because we are install in the server version. Then
click next.
Select the database type and install type
If you want to install the database using single instance,
cluster database or one node database select the appropriate database for you.
Then select the advance type to install because you can do more customization's
using advance mode.
Database customization
Use the below images customization's to install
the database
Execute Configuration Scripts
Login to the root account and execute the given scripts.
# /u01/app/oraInventory/orainstRoot.sh
#
/u01/app/oracle/product/12.1.0/dbhome_1/root.sh
2.2 Set
the Bash Profile
Open the bash_profile using below command and give the
following values to bash_profile and save it.
#vi /home/oracle/.bash_profile
Values
TMPDIR=$TMP; export
TMPDIR
ORACLE_BASE=/u01/app/oracle; export ORACLE_BASE
ORACLE_HOME=$ORACLE_BASE/product/12.1.0/dbhome_1; export
ORACLE_HOME
ORACLE_SID=orcl; export ORACLE_SID
PATH=$ORACLE_HOME/bin:$PATH; export PATH
LD_LIBRARY_PATH=$ORACLE_HOME/lib:/lib:/usr/lib:/usr/lib64;export
LD_LIBRARY_PATH
CLASSPATH=$ORACLE_HOME/jlib:$ORACLE_HOME/rdbms/jlib; export
CLASSPATH
######################################################
IF you want to install the another pluggable database and container database follow this step
IF not skip the step 3 then go to the page III
######################################################
3.
Creating new Container Database and Pluggable
Database using Database Configuration Assistant
3.1.
Login to the Oracle Account
Login to the earlier created oracle user account and give the following command to run the DBCA.
#dbca
3.2 Create New Database
Select the “create Database” to create a new database
3.3. Set the Global Database Name and Pluggable Database
Fill the following name to the database.
Global database name – DSACDB
Pluggable database – DSALEARN
Then select the create as container database because we want to create database as container database.
3.4. Create a New Listener
In this window tic the “create a new listener ” then give the listener name as”LISTENER2” and give the port number as a “1571”.
3.5. Enable Archiving Fast Recovery
Under the storage location enable the archiving and set the path to the Fast recovery area.
3.6. Finalizing the Database
Select the settings as the figures shows.