1.8 Install the Zimbra Mail Server
1.8.1 Set the Configurations to Install Zimbra Mail Server
First you have to login as a root. Then give this following command.
# yum -y install unzip net-tools sysstat openssh-clients perl-core libaio nmap-ncat libstdc++.so.6
Then disable the SELINUX
#getenforce
# setenforce 0


You can permanently disable the selinux by editing the
config file


1.8.2 Download and Unzip the Zimbra Install File
Give this link to download the Zimbra installer. You can download any place you want
To create the directory give “MKDIR temp”
#wgethttps://files.zimbra.com/downloads/8.6.0_GA/zcs-8.6.0_GA_1153.RHEL7_64.20141215151110.tgz


Then Unzip the downloaded file


Then go to the directory

1.8.3 Install the Zimbra Mail Server
After the unzipping the file inside that directory you can find “install.sh” then run it
#./install.sh
Then it will start the installation. Do the installation as below figures shown.


Installation prompt to install packages give “Y” to install


1.8.4 Create a New Mail User
Log into the admin control and select the “Add account”
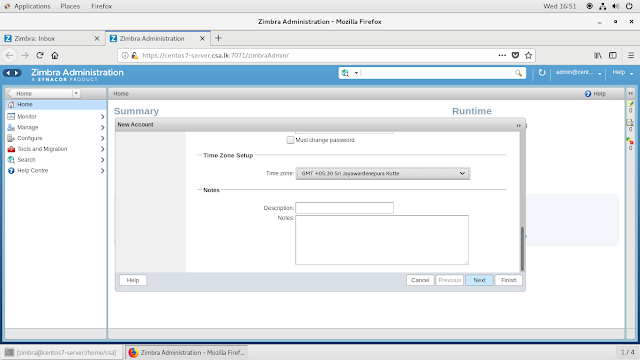
Then give the name and password to create the new email user account in Zimbra.


1.8.5 Add the MX Record to the Forward File
To log to the Zimbra using hostname you must add record to the forward file in named directory.
# cd/var/named/
#vim forward.csa.lk
Centos7-server.csa.lk IN MX 10 10.0.2.5

1.9 Set up the Lightweight Directory Access Protocol (LDAP)
This is the ldap structure i am going to add to the configurations.You can change the this structure if you want.

LDAP is software protocol to share directory information passwords to the different location clients.
1.9.1 Configure Zimbra Lightweight Directory Access Protocol (LDAP)
Give this command to install the necessary packages to install the Zimbra ldap
# yum -y install epel-release
# yum install -y phpldapadmin


1.9.2 Creating LDAP Accounts
1.9.2.1 Creating Main City’s


1.9.2.2 Creating User Accounts to the City’s


1.9.3 Create New Domain for LDAP


1.9.4 Set the New Users Using LDAP


Screenshot Download


To do that go to the “/etc/selinux/config” and edit the
configurations in this figure.


To install the Zimbra in the internet your server must
install the “WGET” package
# yum install wget


The centos7 have some services incompatible with Zimbra So
you must erase otherwise Zimbra service will not run properly.
Disable and erase the
postfix daemon
# systemctl stop postfix
# systemctl disable postfix
# yum remove postfix


1.8.2 Download and Unzip the Zimbra Install File
Give this link to download the Zimbra installer. You can download any place you want
To create the directory give “MKDIR temp”
#wgethttps://files.zimbra.com/downloads/8.6.0_GA/zcs-8.6.0_GA_1153.RHEL7_64.20141215151110.tgz


Then Unzip the downloaded file
# tar xfz zcs-8.6.0_GA_1153.RHEL7_64.20141215151110.tgz


Then go to the directory
# cd zcs-8.6.0_GA_1153.RHEL7_64.20141215151110

1.8.3 Install the Zimbra Mail Server
After the unzipping the file inside that directory you can find “install.sh” then run it
#./install.sh
Then it will start the installation. Do the installation as below figures shown.


Give yes to install the Zimbra ldap


Installation will show you summary of the Zimbra
configuration.


After successfully installed Zimbra you must log to the
Zimbra user and give this command to start the Zimbra service.
# su Zimbra
#Zmcontrol start

You can log into your mail server using host name or IP
address if you want to log into using hostname must enable the named service
and add the MX record to the forward file.
https://10.0.2.5:7071
Then give the admin password and name to login the admin
page of the Zimbra mail server.


1.8.4 Create a New Mail User
Log into the admin control and select the “Add account”
Then give the name and password to create the new email user account in Zimbra.


1.8.5 Add the MX Record to the Forward File
To log to the Zimbra using hostname you must add record to the forward file in named directory.
# cd/var/named/
#vim forward.csa.lk
Centos7-server.csa.lk IN MX 10 10.0.2.5

1.9 Set up the Lightweight Directory Access Protocol (LDAP)
This is the ldap structure i am going to add to the configurations.You can change the this structure if you want.

LDAP is software protocol to share directory information passwords to the different location clients.
1.9.1 Configure Zimbra Lightweight Directory Access Protocol (LDAP)
Give this command to install the necessary packages to install the Zimbra ldap
# yum -y install epel-release
# yum install -y phpldapadmin


Then change the configurations in this figure shown.
# vim /etc/httpd/conf.d/phpldapadmin.conf


Then configure the Config.php
# vim /etc/phpldapadmin/config.php


1.9.2 Creating LDAP Accounts
1.9.2.1 Creating Main City’s


1.9.2.2 Creating User Accounts to the City’s


1.9.3 Create New Domain for LDAP


1.9.4 Set the New Users Using LDAP


Screenshot Download